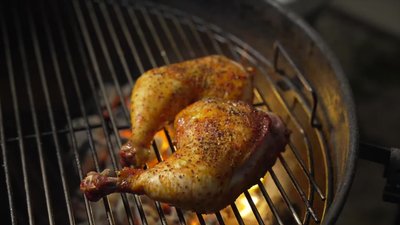
Ever wondered how to achieve perfectly grilled chicken with minimal fuss and equipment? This video unveils the secrets to grilling succulent chicken on a Weber kettle using only the basics: charcoal, your chicken, and a touch of thyme. Forget complicated accessories; this straightforward method focuses on mastering the fundamentals of charcoal grilling for juicy, flavorful results. Learn how to easily quarter a whole chicken for even cooking, discover a clever paper towel trick for lighting your charcoal, and get expert tips on achieving the ideal grilling temperature and recognizing when your chicken is perfectly cooked. We'll cover everything from prepping your chicken with simple seasonings to monitoring the internal temperature to ensure a mouthwatering finish.
This simple yet effective technique produces incredibly delicious chicken, proving that sometimes the best recipes are the simplest. Ready to experience the joy of perfectly grilled chicken? Let's dive into the step-by-step instructions below and transform your next backyard barbecue!
Preparation and Safety Guidelines
- Weber Kettle grill
- Charcoal
- Chicken
- Kitchen shears
- Paper towels
- Oil
- Thyme
- Thermometer
- Seasoning
- Always ensure your charcoal is completely ashed over before placing chicken on the grill to avoid flare-ups and uneven cooking. Use a chimney starter for efficient and safe charcoal lighting.
- Use a meat thermometer to check the internal temperature of the chicken; it should reach 165°F (74°C) in the thickest part to ensure it's cooked thoroughly and safely.
- Never leave the grill unattended while cooking. Keep a close eye on the chicken and adjust the vents as needed to maintain consistent heat.
Step-by-Step Instructions
Prepare the Grill
- Start up the Weber Kettle grill and add charcoal to the indirect side.
- Light the charcoal using oiled paper towels (if you don't have a charcoal starter).
- Let the charcoal burn for about 15 minutes.
- Stir up the charcoal and place the grill grate on.


Prepare the Grill Prepare the Chicken
- Quarter the chicken using kitchen shears. Remove the spine and kill bone to make it easier to cut.
- Season the chicken with your choice of seasonings. The video uses sesame seasoning, Glory salt, and pepper.


Prepare the Chicken Grill Setup
- Oil the grill grates to prevent sticking.
- Place the chicken pieces on the grill, thicker parts of the breast near the heat source.
- 325-375°F.


Grill Setup Grilling Process
- Rotate the chicken halfway through cooking.
- Adjust vents as needed to maintain temperature. Close the top vent if it gets too hot.
- Check internal temperature with a thermometer. Aim for 165°F.
- Once breast meat reaches 160°F, move to direct heat for additional color. Dark meat can handle higher temperatures (up to 185°F).


Grilling Process Finishing and Serving
- Remove chicken from grill and let it rest.
- Separate drumsticks from thighs and serve.


Finishing and Serving
Read more: How to Grill a Turkey
Tips
- Consider buying a whole chicken and quartering it yourself to save money.
- Invest in a good meat thermometer to ensure chicken reaches a safe internal temperature.
- Don't overcook the breast meat to avoid dryness.
- Allow carry-over heat to take the chicken to 165°F after removing it from the grill.


