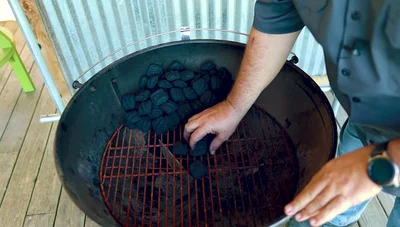
The Weber Kettle, a seemingly simple charcoal grill, is capable of incredibly precise temperature control, unlocking a world of cooking possibilities far beyond burgers and hot dogs. From delicate roasts to perfectly smoked ribs, mastering the art of temperature regulation on your kettle unlocks culinary potential you might not have thought possible. Understanding airflow and fuel management is key, and slight adjustments can dramatically alter the heat within your grill. Many believe consistent temperatures are unattainable on a kettle, but with the right techniques, even low and slow cooks become achievable.
This misconception often leads to unevenly cooked food and frustration. However, by following the step-by-step guide detailed below, you'll learn to confidently control the temperature of your Weber Kettle, transforming it into a versatile and reliable cooking machine. Let's dive into the techniques that will turn you into a kettle grilling master.
Safety Guidelines
- Always use heat-resistant gloves when handling hot grill components like the lid, grates, and charcoal.
- Never add lighter fluid to hot coals; this can cause dangerous flare-ups. Ensure coals are fully extinguished before disposal.
- Maintain proper ventilation by keeping the vents open appropriately for your desired temperature. Insufficient oxygen can lead to dangerous carbon monoxide buildup.
Methods: Low and Slow Smoking (225-275°F)
Tools Needed
- Weber Kettle Grill
- Chimney starter
- Smoke wood
- Optional: Temperature probe
- Optional: Slow & Sear Basket
Step-by-Step Instructions
Prepare Charcoal
- Pile 75 unlit charcoal briquettes in the back of the grill.
- Light 10 briquettes in a chimney starter.
- Dump lit briquettes onto the edge of the unlit stack.


Prepare Charcoal Add Smoke Wood and Ignite
- Place smoke wood on top of lit charcoal.

Add Smoke Wood and Ignite Initial Vent Adjustment
- Close the lid, bottom vent to 1/4 open, top vent to 1/4 open.

Initial Vent Adjustment Fine-tune Temperature
- Adjust top vent for temperature control.
Tips
- Only light a few briquettes initially for better temperature control.
- It takes about 15 minutes for temperature changes to take effect.
- Place the top vent opposite the lit charcoal for better smoke circulation.
Methods: Hot and Fast Grilling (350-400°F)
Tools Needed
Step-by-Step Instructions
Prepare the Grill
- Open the bottom vent all the way.

Prepare the Grill Fuel the Grill
- Light a full chimney of charcoal and pour it into the grill.

Fuel the Grill Arrange Charcoal and Wood
- Spread briquettes evenly for whole-grill cooking or bank them to one side for two-zone grilling.
- Add smoke wood (optional).


Arrange Charcoal and Wood Finalize Setup
- Close the lid and open the top vent all the way.
Tips
- The setup depends on whether you are doing whole-grill or two-zone cooking.
Methods: Searing (550°F+)
Tools Needed
- Weber Kettle Grill
- Chimney starter
- Optional: Cast iron skillet
- Optional: Vortex
Step-by-Step Instructions
Prepare the Grill for Searing
- Open the bottom vent all the way.
- Pour a full chimney of lit charcoal into the middle of the grill.
- Spread the charcoal slightly, concentrating the heat.


Prepare the Grill for Searing Add Optional Accessories
- Place a cast iron skillet (optional) or vortex (optional) on top of the heat.

Add Optional Accessories Start Searing
- Leave the lid off.
Tips
- Remove any temperature probes before searing at high temperatures.
Read more: Essential Grilling Techniques with Charcoal


