The Traeger pellet grill, with its signature smoky flavor, is a dream come true for rib enthusiasts. But even with this amazing tool, achieving perfectly tender, fall-off-the-bone ribs can feel elusive. This often comes down to understanding the nuances of the cooking process and choosing the right technique for your desired outcome. Are you after the classic, competition-style rib with a glistening bark? Or perhaps you prefer the juicy, tender pull-apart style? This article explores mastering both, showcasing two distinct approaches to Traeger rib cooking that guarantee mouthwatering results.
Forget inconsistent results and dry, tough ribs! We’ll guide you through two comprehensive methods, each offering a unique path to rib perfection on your Traeger. From the initial trim and seasoning to the perfect internal temperature and finishing techniques, we'll cover every step, ensuring you're equipped to conquer the art of Traeger rib cooking. Get ready to embark on a step-by-step journey to achieve your own "perfect cook."
Preparation and Safety Guidelines
- Always use heat-resistant gloves when handling the hot rib rack and ribs.
- Never leave your Traeger unattended while cooking, especially at high temperatures.
- Ensure your ribs are properly placed on the rack to ensure even cooking and prevent sticking.
Step-by-Step Instructions
Prepare Ribs
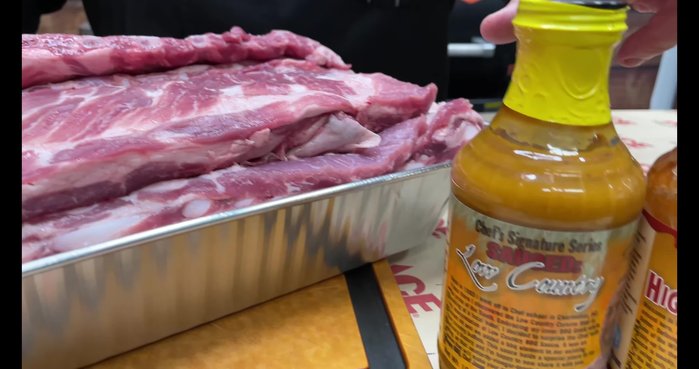
- Remove the membrane from the St. Louis style spare ribs.

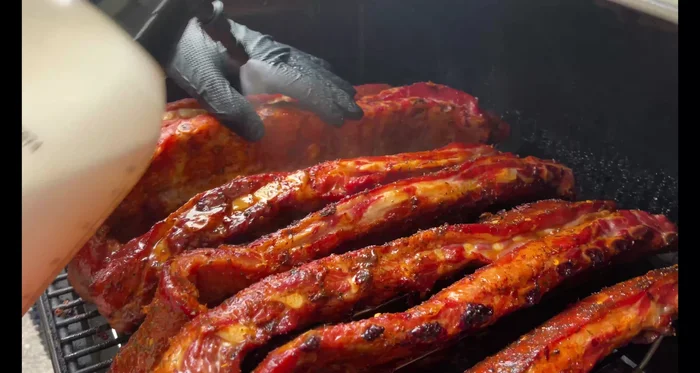
Prepare Ribs Season Ribs
- Apply olive oil as a binder, then generously coat the ribs with Oink and Rub-a-dub rubs on both sides.
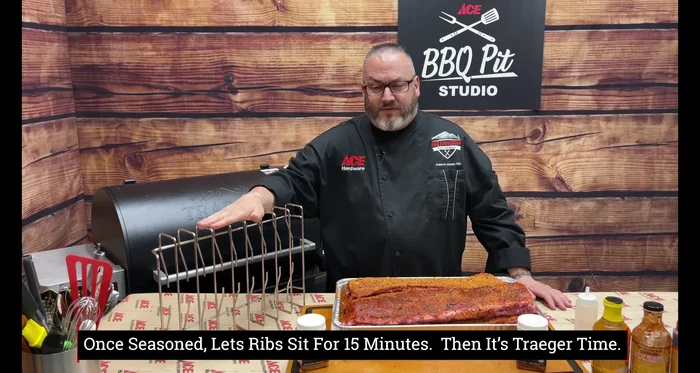
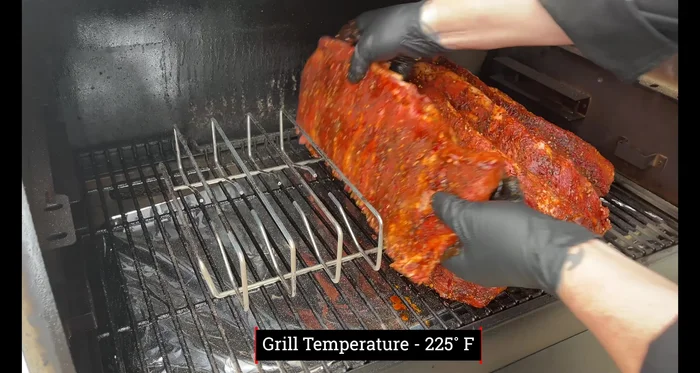
Season Ribs Load Rib Rack
- Place the seasoned ribs onto the Traeger rib rack.
Load Rib Rack Initial Cook
- Set the Traeger to 225°F and cook for the first 45 minutes.
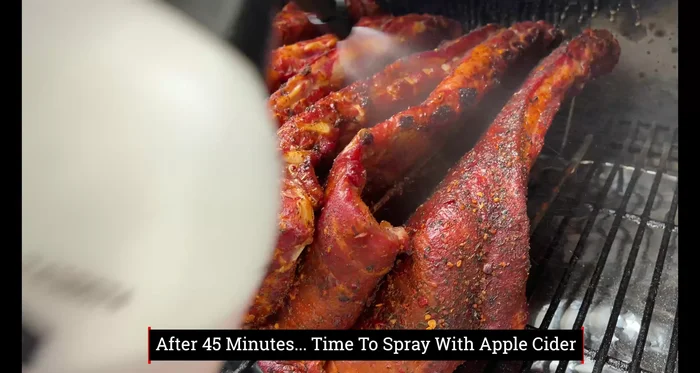
Initial Cook Spritz and Separate
- After 45 minutes, spritz the ribs with apple cider and separate them if needed.
Spritz and Separate Repeat Spritzing
- Continue spritzing with apple cider every 45 minutes for the next few hours.
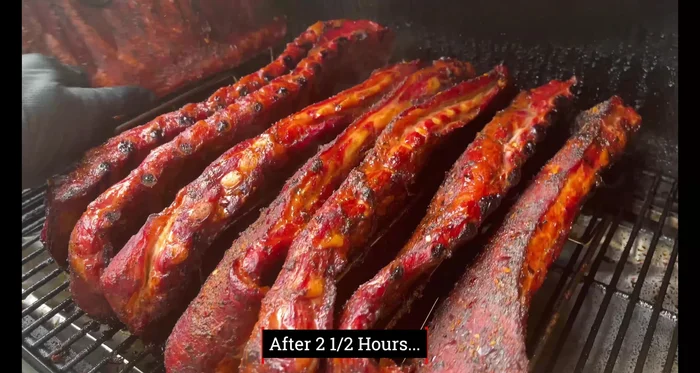
Repeat Spritzing Flip and Rotate Ribs
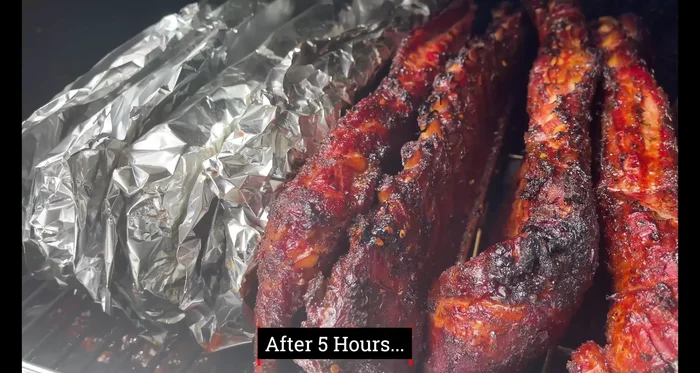
- At the 2.5-hour mark, flip and rotate the ribs to ensure even cooking.
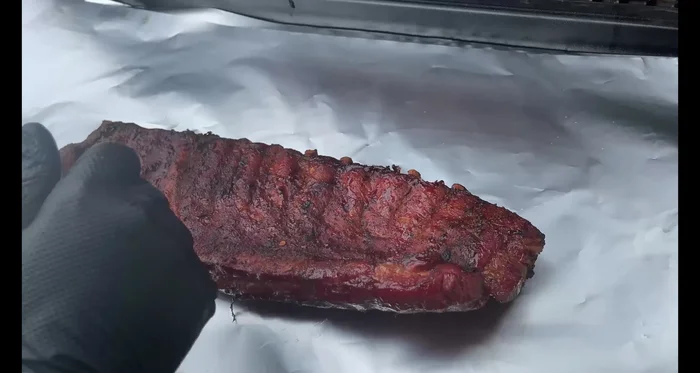
Flip and Rotate Ribs Prepare Fall-Off-the-Bone Ribs
- At the 4-hour mark, for fall-off-the-bone ribs, add butter, brown sugar, and fire honey to the top.
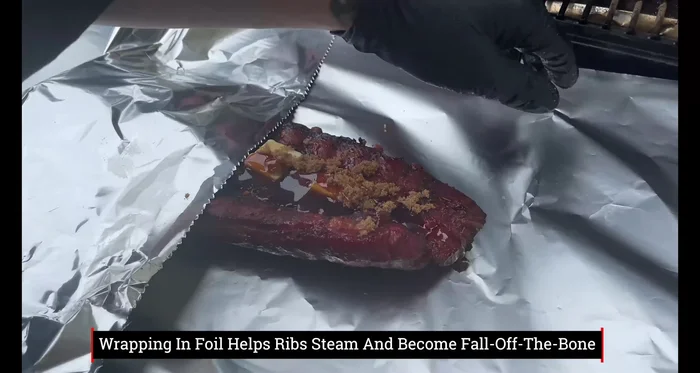
Prepare Fall-Off-the-Bone Ribs Wrap Fall-Off-the-Bone Ribs
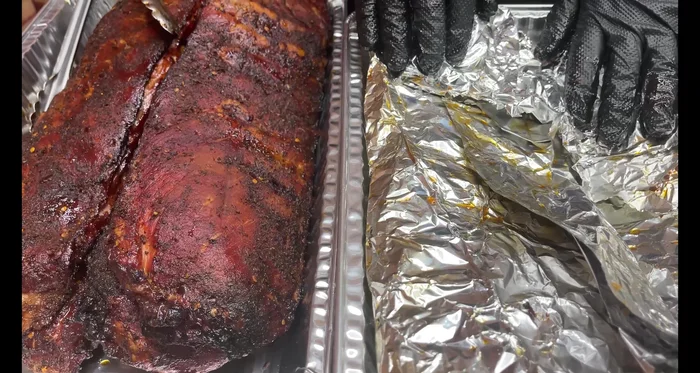
- Wrap the fall-off-the-bone ribs tightly in foil.
Wrap Fall-Off-the-Bone Ribs Final Cook
- Increase the Traeger temperature to 350°F for the last hour. Give the ribs one last spritz.
Final Cook Rest Ribs
- Let the fall-off-the-bone ribs rest for 5-10 minutes after cooking.
Rest Ribs

Tips
- Remove the membrane from the ribs for better flavor penetration and tenderness.
- Use a spoon to help remove the membrane.
- Season both sides of the ribs for even flavor.
- Regularly spritzing with apple cider keeps the ribs moist.
- Wrapping the ribs in foil during the final hour helps create fall-off-the-bone tenderness.