This comprehensive guide provides a step-by-step walkthrough for assembling the Dyna-Glo DGF350CSP gas grill. We’ll cover everything from unpacking and inventorying the components to the final leak check, ensuring you have a safe and enjoyable grilling experience. This detailed instruction set is designed to help you through each stage of assembly, minimizing frustration and maximizing efficiency. Clear instructions and helpful tips are included to address potential challenges along the way, ensuring a smooth and successful build.Whether you're a seasoned DIY enthusiast or a first-time grill assembler, this guide will walk you through the process with ease. We'll cover the base assembly, grill body attachment, side table installation, side burner setup, and the final steps involving the heat tents, grates, and grease cup. We'll also emphasize the crucial importance of a final leak check to ensure your safety and the longevity of your new grill. Get ready to fire up your Dyna-Glo DGF350CSP!
Read more: Top 10 Blue Rhino Gas Grills: Reviews & Buying Guide
Unboxing and Parts Inventory
Before you begin assembling your Dyna-Glo DGF350CSP gas grill, take the time to carefully unpack all the components. It's crucial to inventory each part against the instruction manual to ensure nothing is missing. This prevents frustration later in the assembly process.
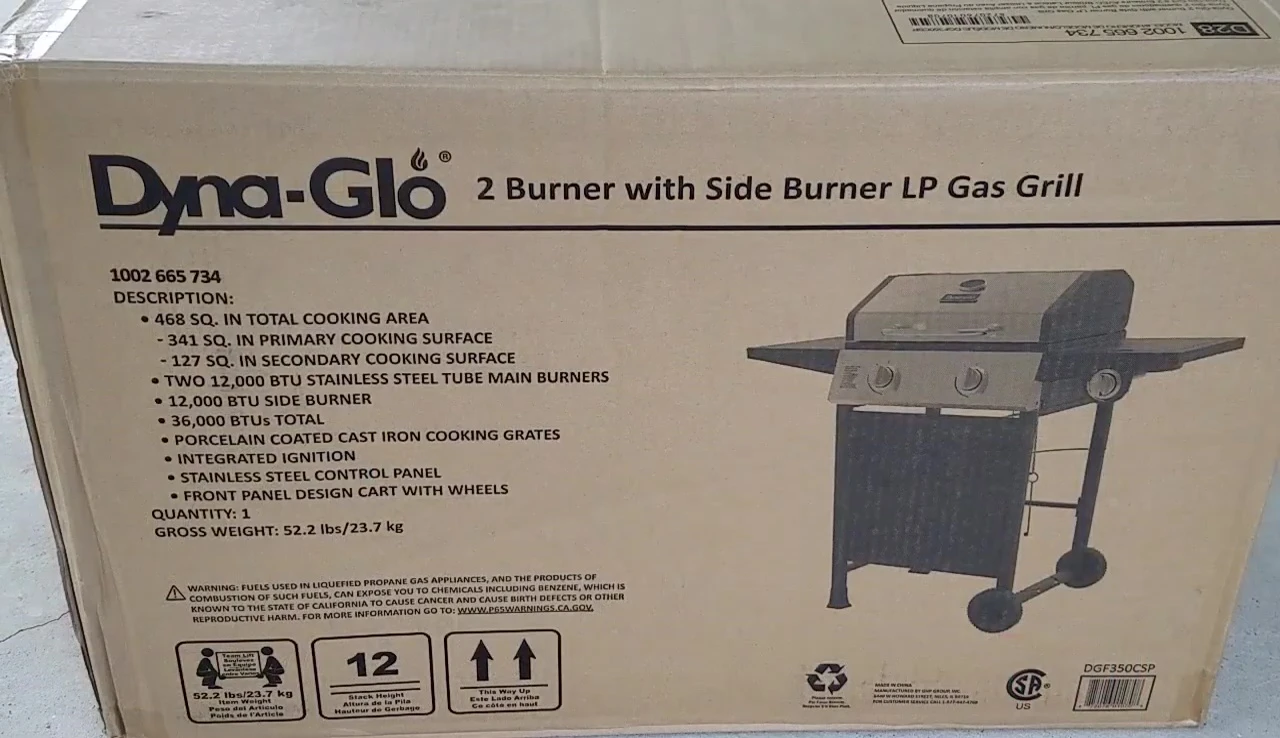
The parts are often tightly packed, so be methodical in your search. Don't rush this step; a thorough check will save you time and potential headaches. Take photos of the parts as you go, using the manual as your guide.

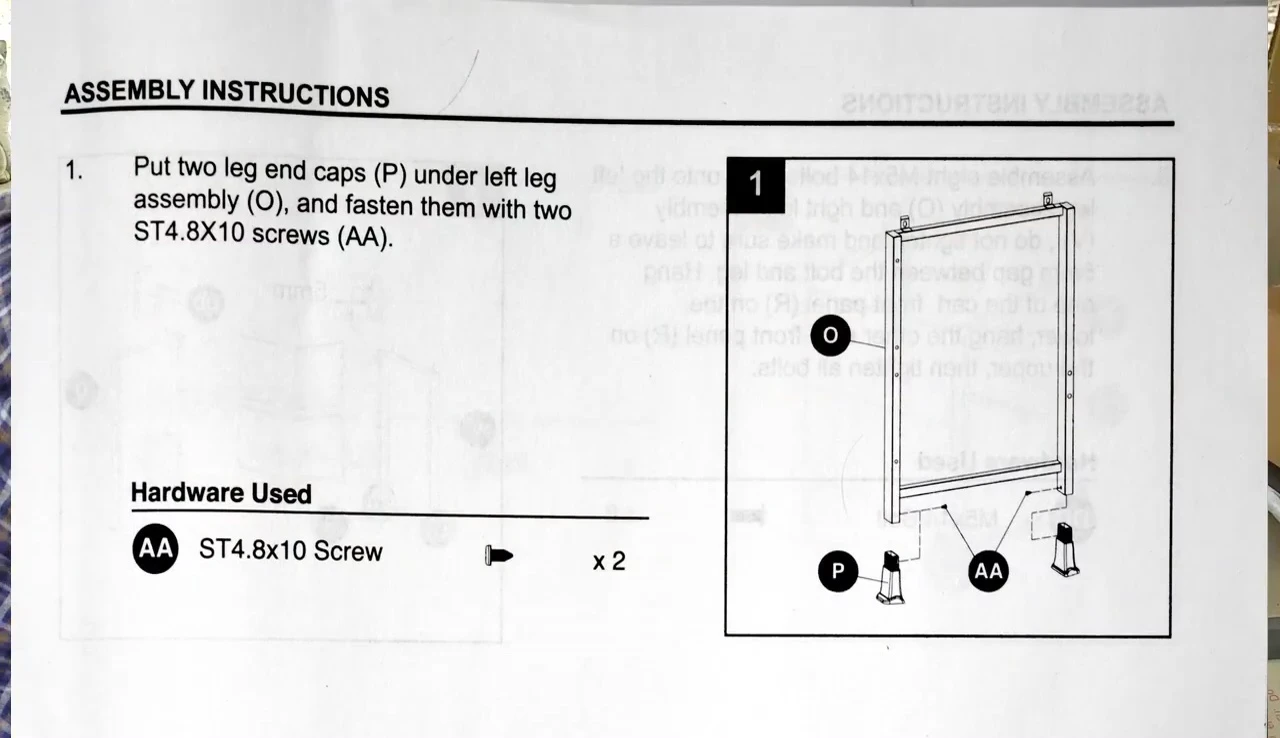
Assembling the Grill Base
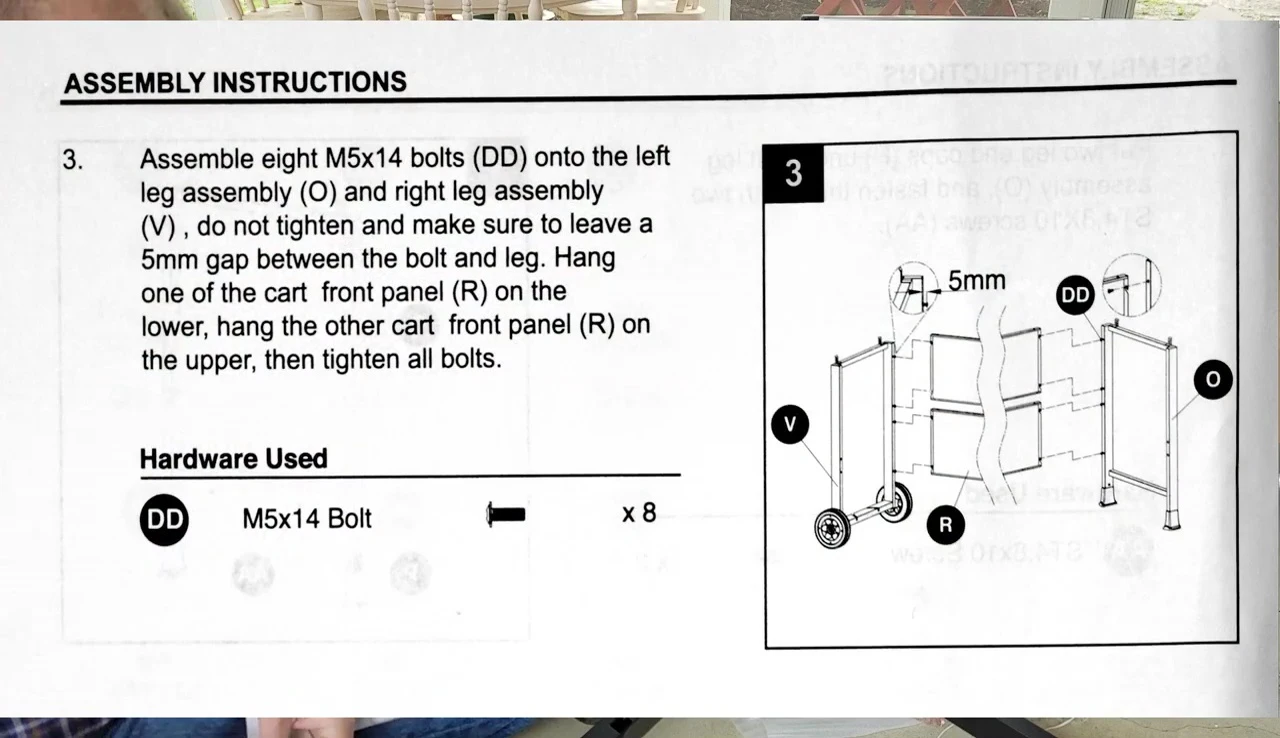
The base assembly begins with attaching the leg end caps and wheels. Ensure the wheels are securely fastened but still rotate freely. This prevents wobbling and ensures stability for the grill.
Next, connect the leg assemblies together using the provided bolts. Make sure each bolt is firmly tightened to create a solid and stable foundation for the grill. Double-check your work before proceeding to the next step.
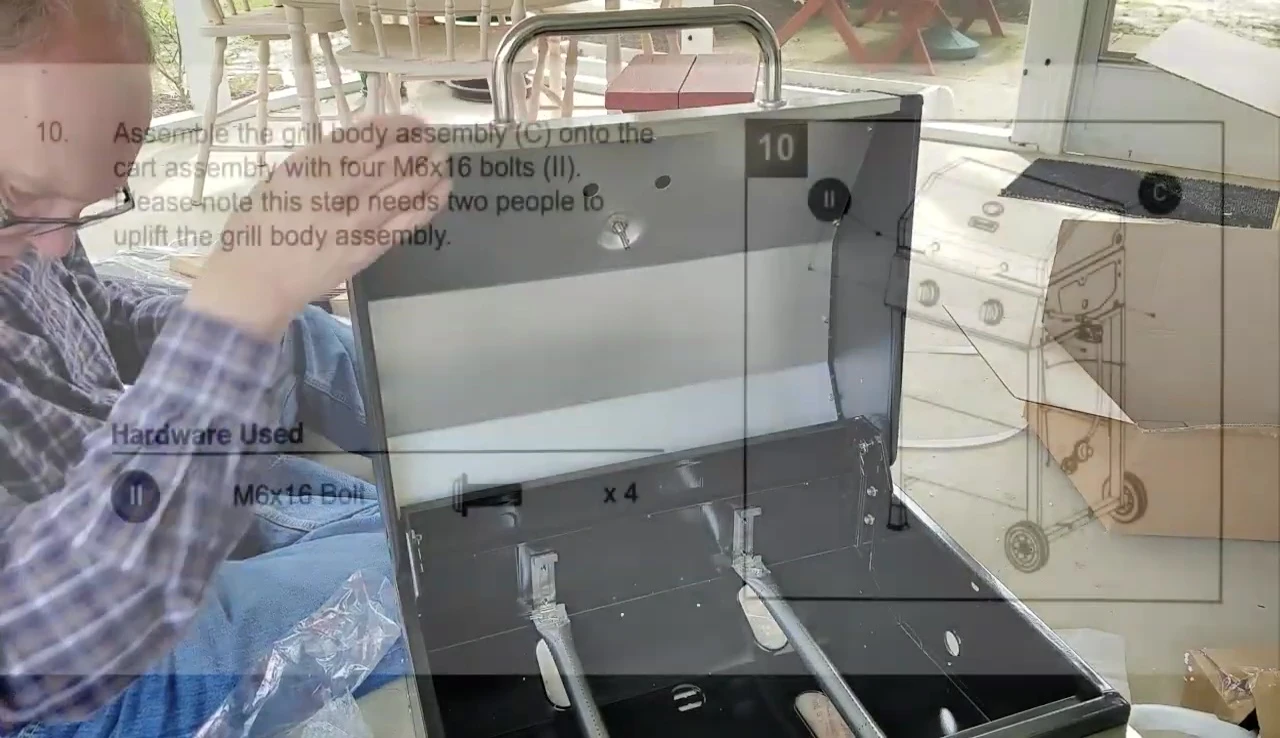
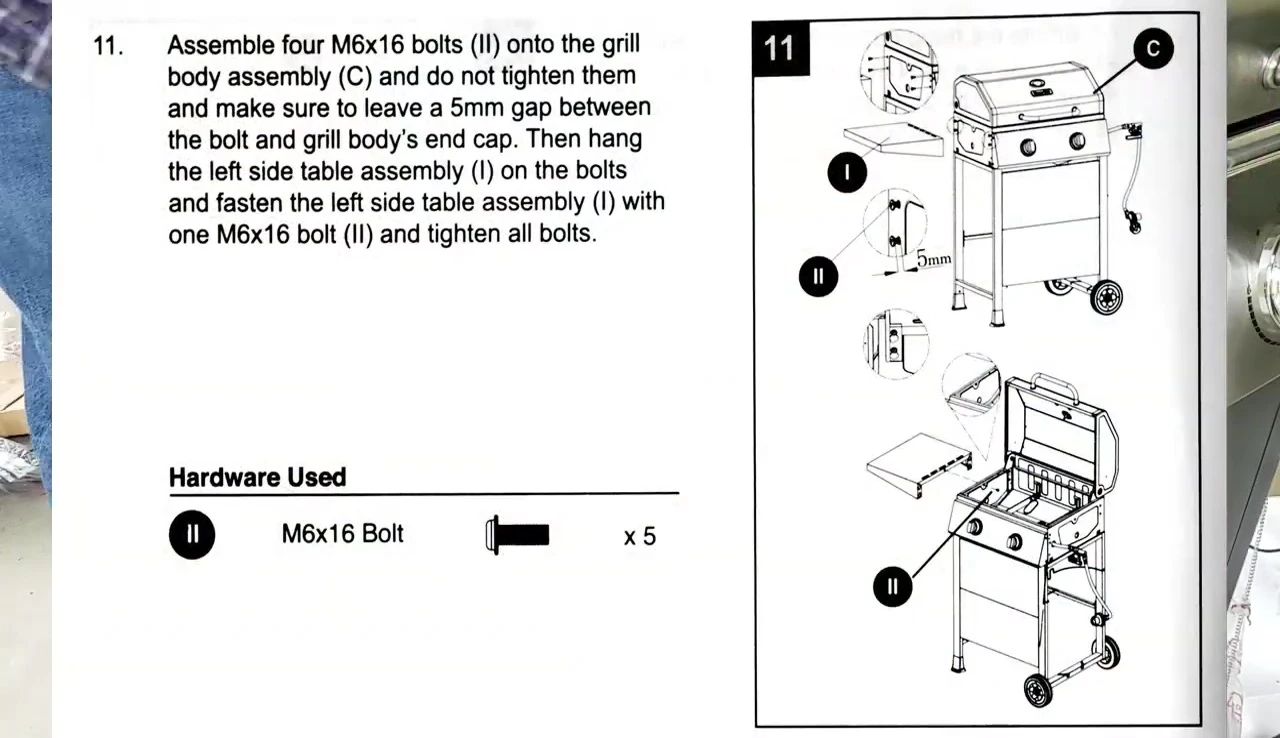
Attaching the Grill Body and Side Tables
Carefully lift the grill body and attach it to the base. It's recommended to have two people for this step. Make sure the match holder isn't obstructed.
Next, install the side tables. Ensure that all bolts are securely tightened for a stable and sturdy side table. Pay attention to any tricky bolts during this stage.
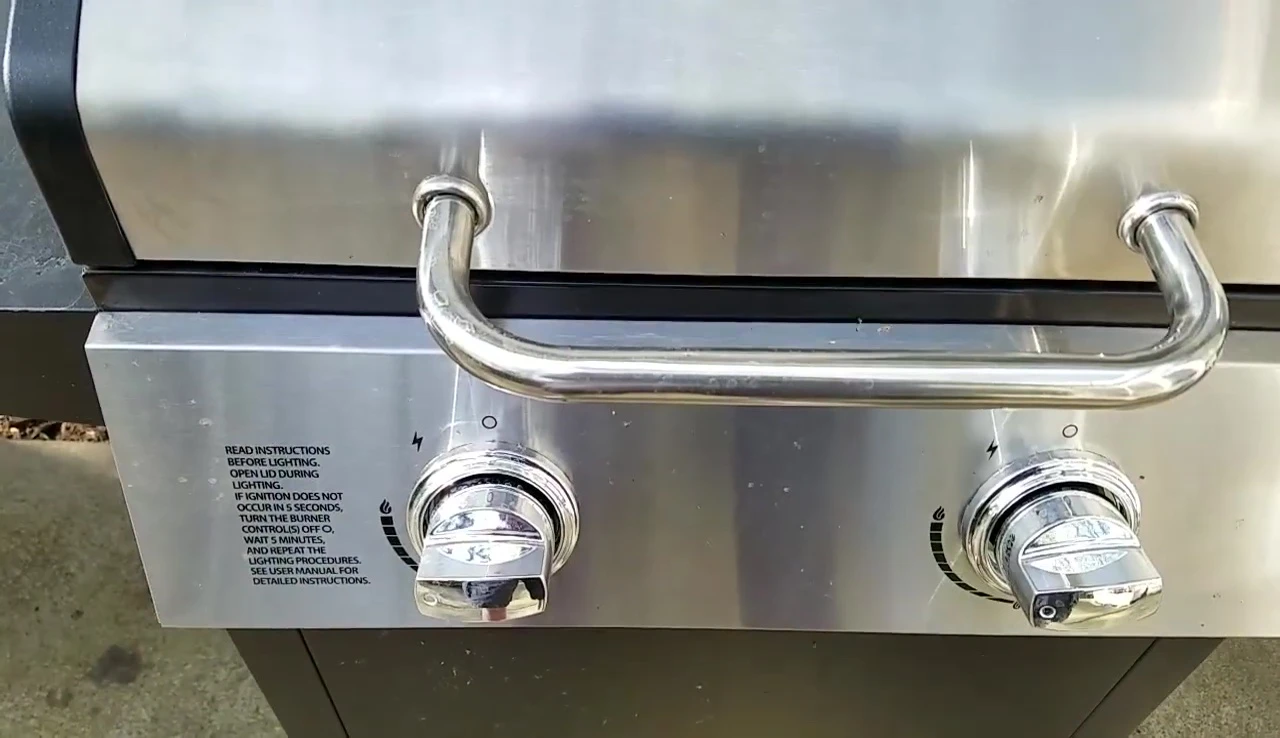
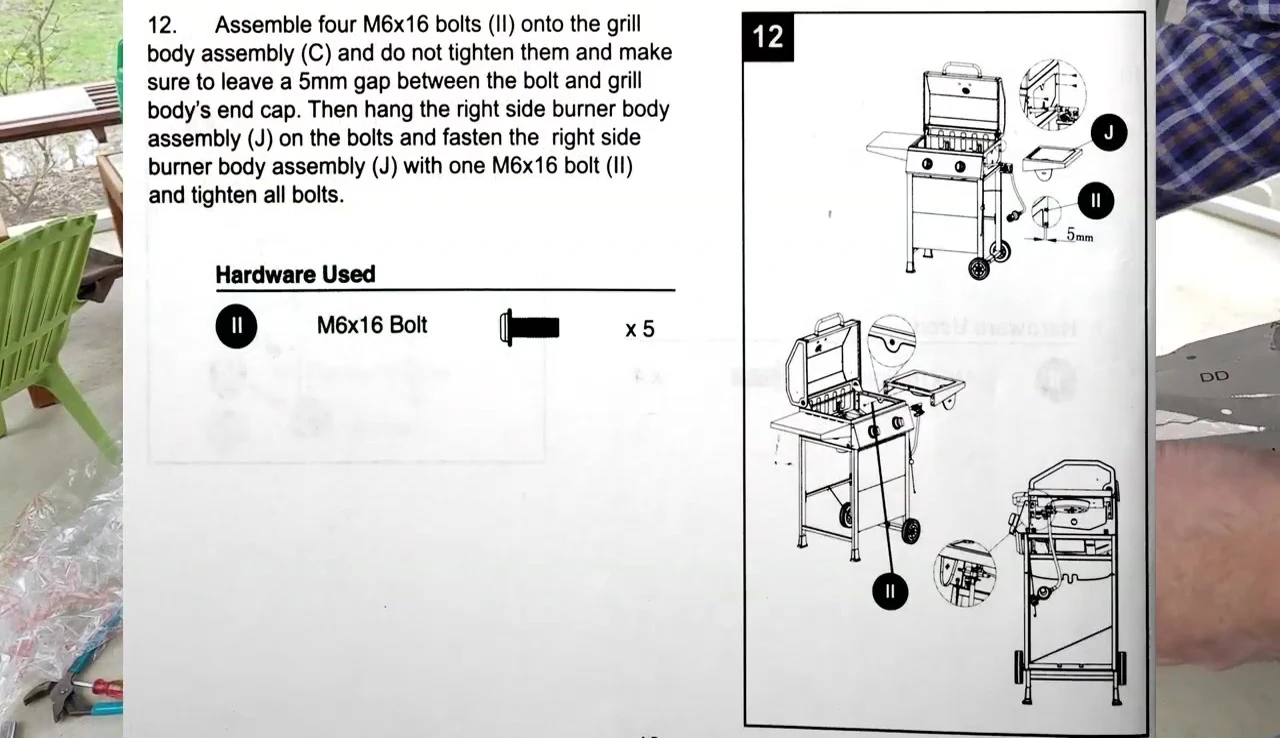
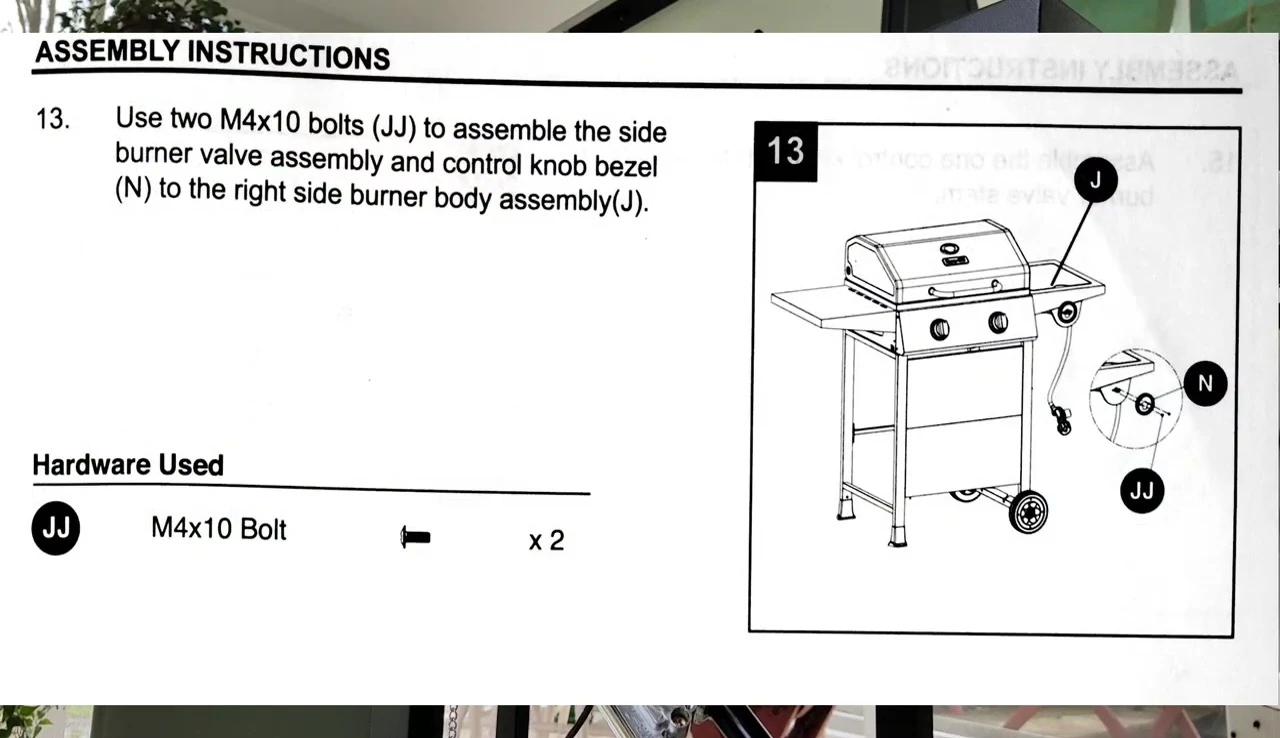
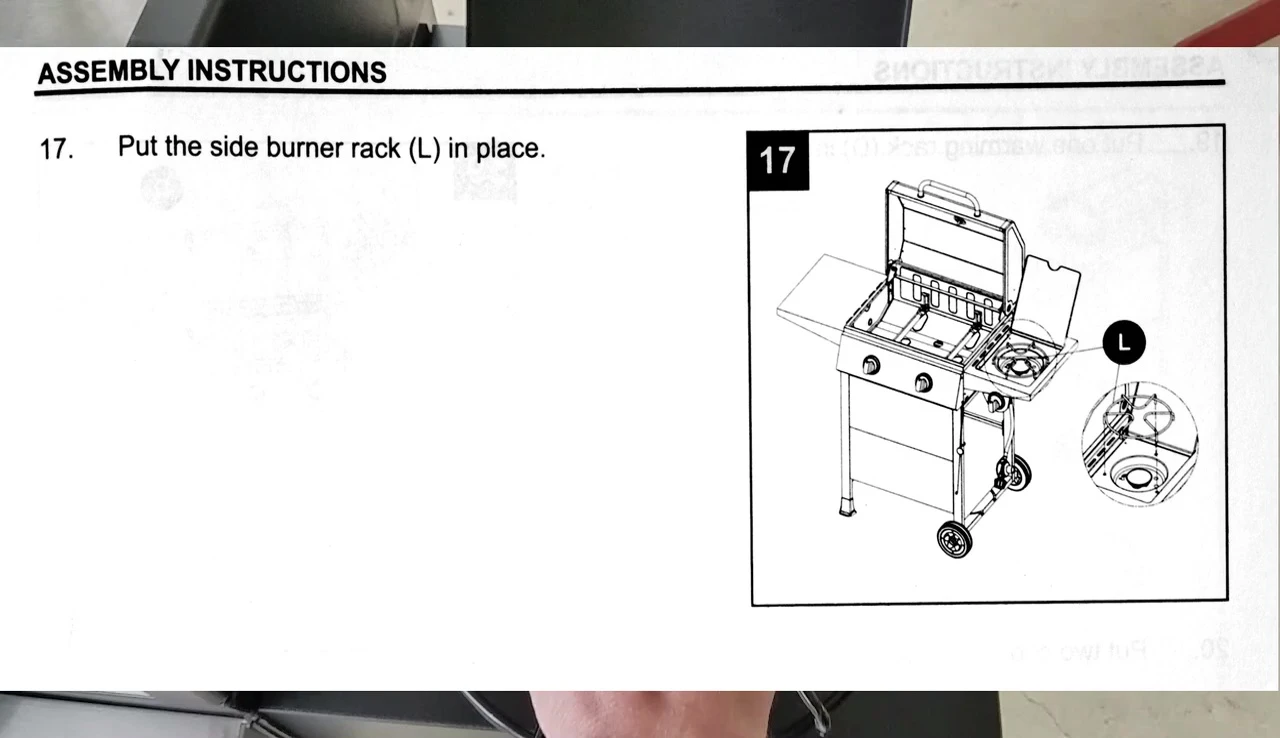
Installing the Side Burner
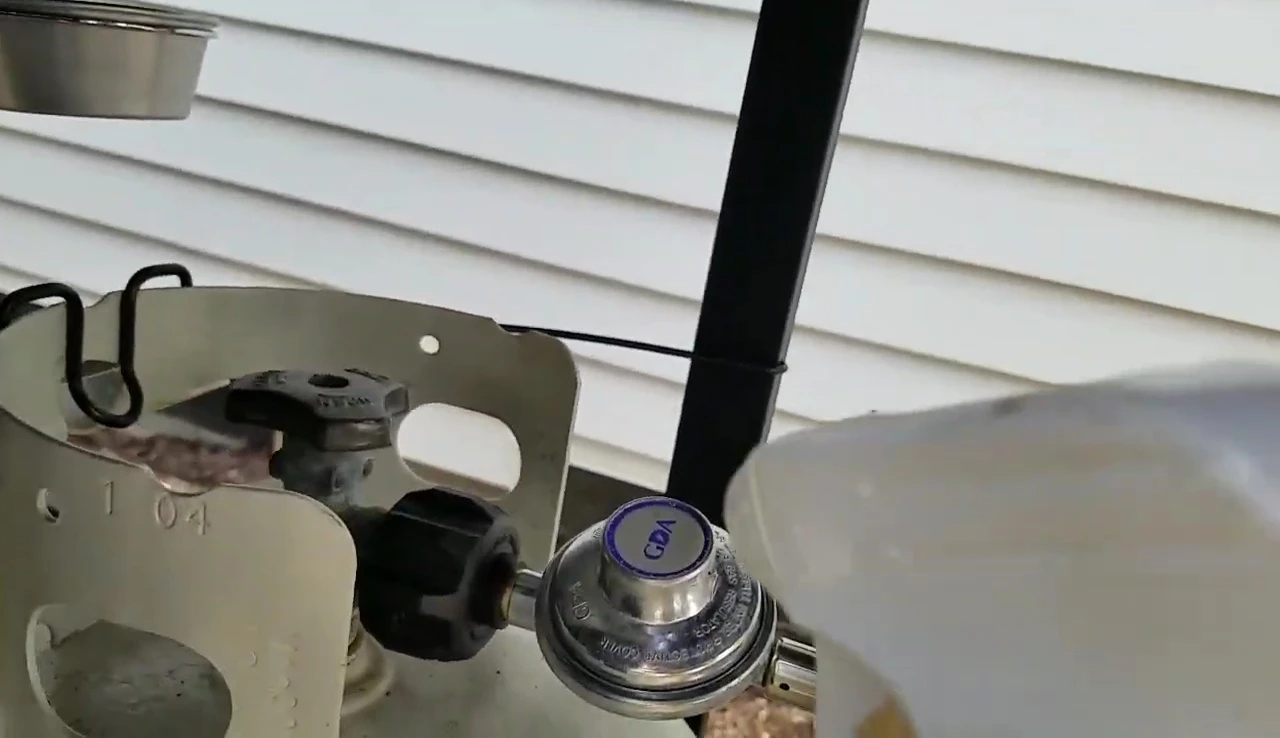
Installing the side burner involves attaching the burner assembly, valve assembly, and control knob. Take care to position the gas valve correctly.
Pay close attention to the flexible gas piping and ensure proper positioning before attaching the control knob. This step is crucial for the proper function of the side burner.
Final Assembly and Leak Check
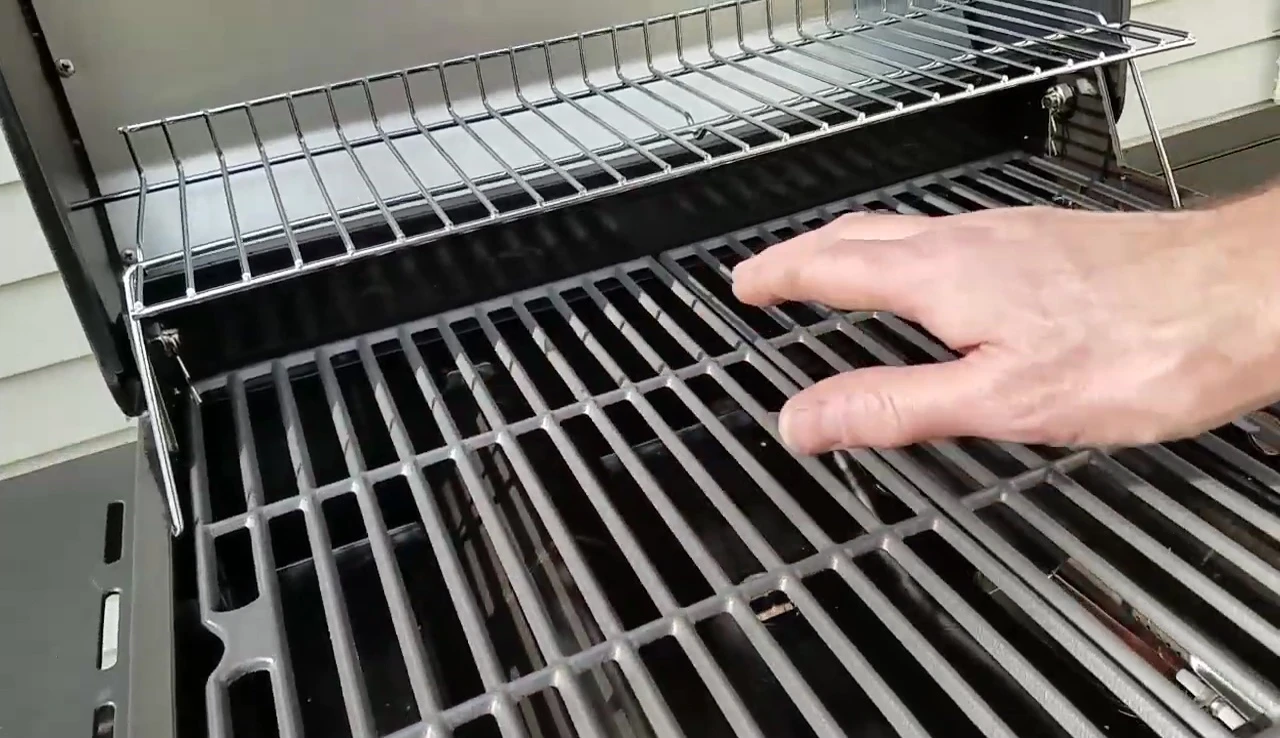
Complete the final assembly steps including the installation of heat tents, warming rack, cooking grates and grease cup. Pay attention to the details, and carefully secure every part.
Before using the grill, perform a thorough leak check using a soap and water solution. This is essential for safety and prevents gas leaks. Address any leaks immediately before proceeding.
Conclusion and Final Thoughts
Assembling the Dyna-Glo DGF350CSP gas grill is straightforward with detailed instructions. Take your time with each step, and refer to the manual when needed. The grill's construction is solid for its price point.
Proper cleaning and storage, especially protecting the bottom from rust, will significantly extend the grill's lifespan. Overall, the Dyna-Glo DGF350CSP offers good value for its features and ease of assembly.