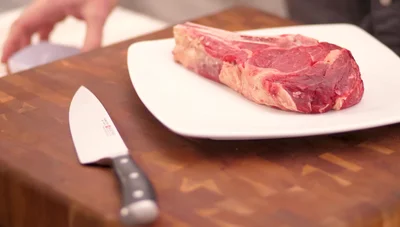
The ribeye steak. A king among cuts, boasting a rich marbling that promises unparalleled flavor and tenderness. But achieving that perfect sear, that irresistible crust giving way to a luscious medium-rare interior, requires a bit more than just tossing it on the grill. Many fall short, ending up with tough, overcooked disappointments, or a beautiful sear masking a raw center. Mastering this technique elevates your grilling game from amateur to artisan. The difference lies in understanding the nuances of heat control, timing, and the critical importance of proper preparation.
This guide will walk you through each step, ensuring you consistently produce a ribeye that's perfectly seared on the outside and juicy, medium-rare perfection on the inside. From selecting the right steak to the final resting period, we'll cover everything you need to know to create an unforgettable grilling experience. Let's dive into the step-by-step process!
Preparation and Safety Guidelines
- Weber Genesis gas grill
- Tongs
- Meat thermometer (optional)
- Use a meat thermometer to ensure food safety. Ribeye is medium-rare at 130-135°F (54-57°C) internal temperature. Do not rely on visual cues alone.
- Always handle raw meat carefully. Wash your hands, utensils, and cutting board thoroughly before and after handling the ribeye.
- Ensure your grill is clean to prevent flare-ups and cross-contamination. High heat is key for searing but watch for flames that could burn your steak.
Step-by-Step Instructions
Prepare the Grill
- Preheat your grill to high heat, aiming for a screaming hot surface. Close the lid to retain heat.

Prepare the Grill Prepare the Steak
- Let it sit at room temperature for about 30 minutes, then generously season with kosher salt and black pepper.
- Dunk the seasoned steak in clarified butter before grilling for enhanced flavor and browning.


Prepare the Steak Sear the Steak
- Place the steak on the hot grill grates. Sear for 2 minutes per side, then crosshatch by turning the steak 45 degrees and searing for another 2 minutes per side. This creates a beautiful sear and good grill marks.

Sear the Steak Finish Cooking
- To finish cooking and prevent burning, move the steak to a lower heat area of the grill, keeping the lid closed.

Finish Cooking Check Doneness
- Monitor the internal temperature of the steak using a meat thermometer (optional). For medium-rare, aim for 120-125°F (49-52°C). Alternatively, check doneness by feeling the firmness of the steak. Medium-rare will have some give but be more firm than rare.

Check Doneness Rest and Serve
- Once cooked to your liking, remove the steak from the grill and let it rest for about 10 minutes before slicing and serving.

Rest and Serve
Read more: Fire Honey Glazed Shrimp Recipe
Tips
- Use a thick-cut steak (at least 1.5 inches) to ensure even cooking and a good sear.
- Lightly press the steak with tongs to ensure good contact with the grill grates.
- Season the entire steak, including the sides.
- Keep the clarified butter close to the grill to avoid making a mess.


