This recipe details a simple yet elegant method for cooking a venison rack on a Kamado Joe grill, resulting in a tender and flavorful roast. The process focuses on maximizing the venison's natural taste while achieving a perfect balance of smoky char and juicy interior. From initial preparation, involving trimming excess fat and seasoning with a robust garlic and red pepper blend, to the precise temperature control of the Kamado Joe, each step is carefully explained to ensure a successful outcome. Even first-time venison cooks will find this recipe approachable and rewarding.This guide walks you through prepping the venison rack—removing the silver skin and rib cap for optimal tenderness—and expertly utilizes the Kamado Joe's versatility for both indirect cooking and a final, flavorful sear. The detailed instructions, including internal temperature targets and resting times, guarantee a perfectly cooked venison rack every time. Discover how to achieve a rich, gamey flavor without sacrificing juiciness, resulting in a dish that’s both satisfying and surprisingly easy to prepare.
Pros And Cons
- Lean meat
- Juicy and moist when cooked properly
- Tender when cooked properly
- Good flavor, especially when seasoned
- Lean meat (can be challenging to cook without drying out)
- Stronger flavor than beef (may not appeal to all)
- Complements the earthy gamey flavors of venison
- Contains garlic and red pepper for strong flavors
Read more: 10 Best Big Green Egg Rib Racks: A Buyer's Guide
Preparing the Venison Rack
The venison rack, approximately one and a half pounds and four bones, was initially quite bloody and moist. Before cooking, I trimmed away the silver skin, a connective tissue that would make the meat tough. This is a crucial step for a tender final product.

Next, I removed the rib cap, the outer layer of meat surrounding the eye of the roast. I focused on cooking the eye, a leaner, more tender cut. The trimmed rib cap can be saved for another use, such as making venison burgers.

Finally, I generously seasoned the rack with Cattleman's Grill Tri-Tip seasoning. This blend, rich in garlic and red pepper, complements the venison's earthy flavor.

Kamado Joe Setup and Cooking Process
I prepared my Kamado Joe Classic II with a good amount of lump charcoal, aiming for a temperature between 325 and 350 degrees Fahrenheit. This allows for both indirect cooking and a final sear.

Adding hickory wood chips provided a subtle smoky flavor, avoiding an overpowering smoke taste given the quick cook time. It's important to ensure the chips are actively burning and not just smoldering.

With the Kamado Joe at around 250-300 degrees Fahrenheit, I placed the seasoned venison rack on the grill. The venison cooked for approximately 25-30 minutes, reaching an internal temperature of 125 degrees Fahrenheit.

Searing and Resting
Once the venison reached 125°F, I removed it from the grill. Then, I adjusted the Kamado Joe’s configuration to access the hot coals for a quick sear on both sides. Because venison is lean, a short sear mainly improves color and texture.

Following the sear, I let the venison rest uncovered for about 10 minutes. This allows for carryover cooking, raising the internal temperature slightly (about 5 degrees) without overcooking. This resting period is crucial to retain moisture.

This step enhances the tenderness and improves the overall quality of the final dish.

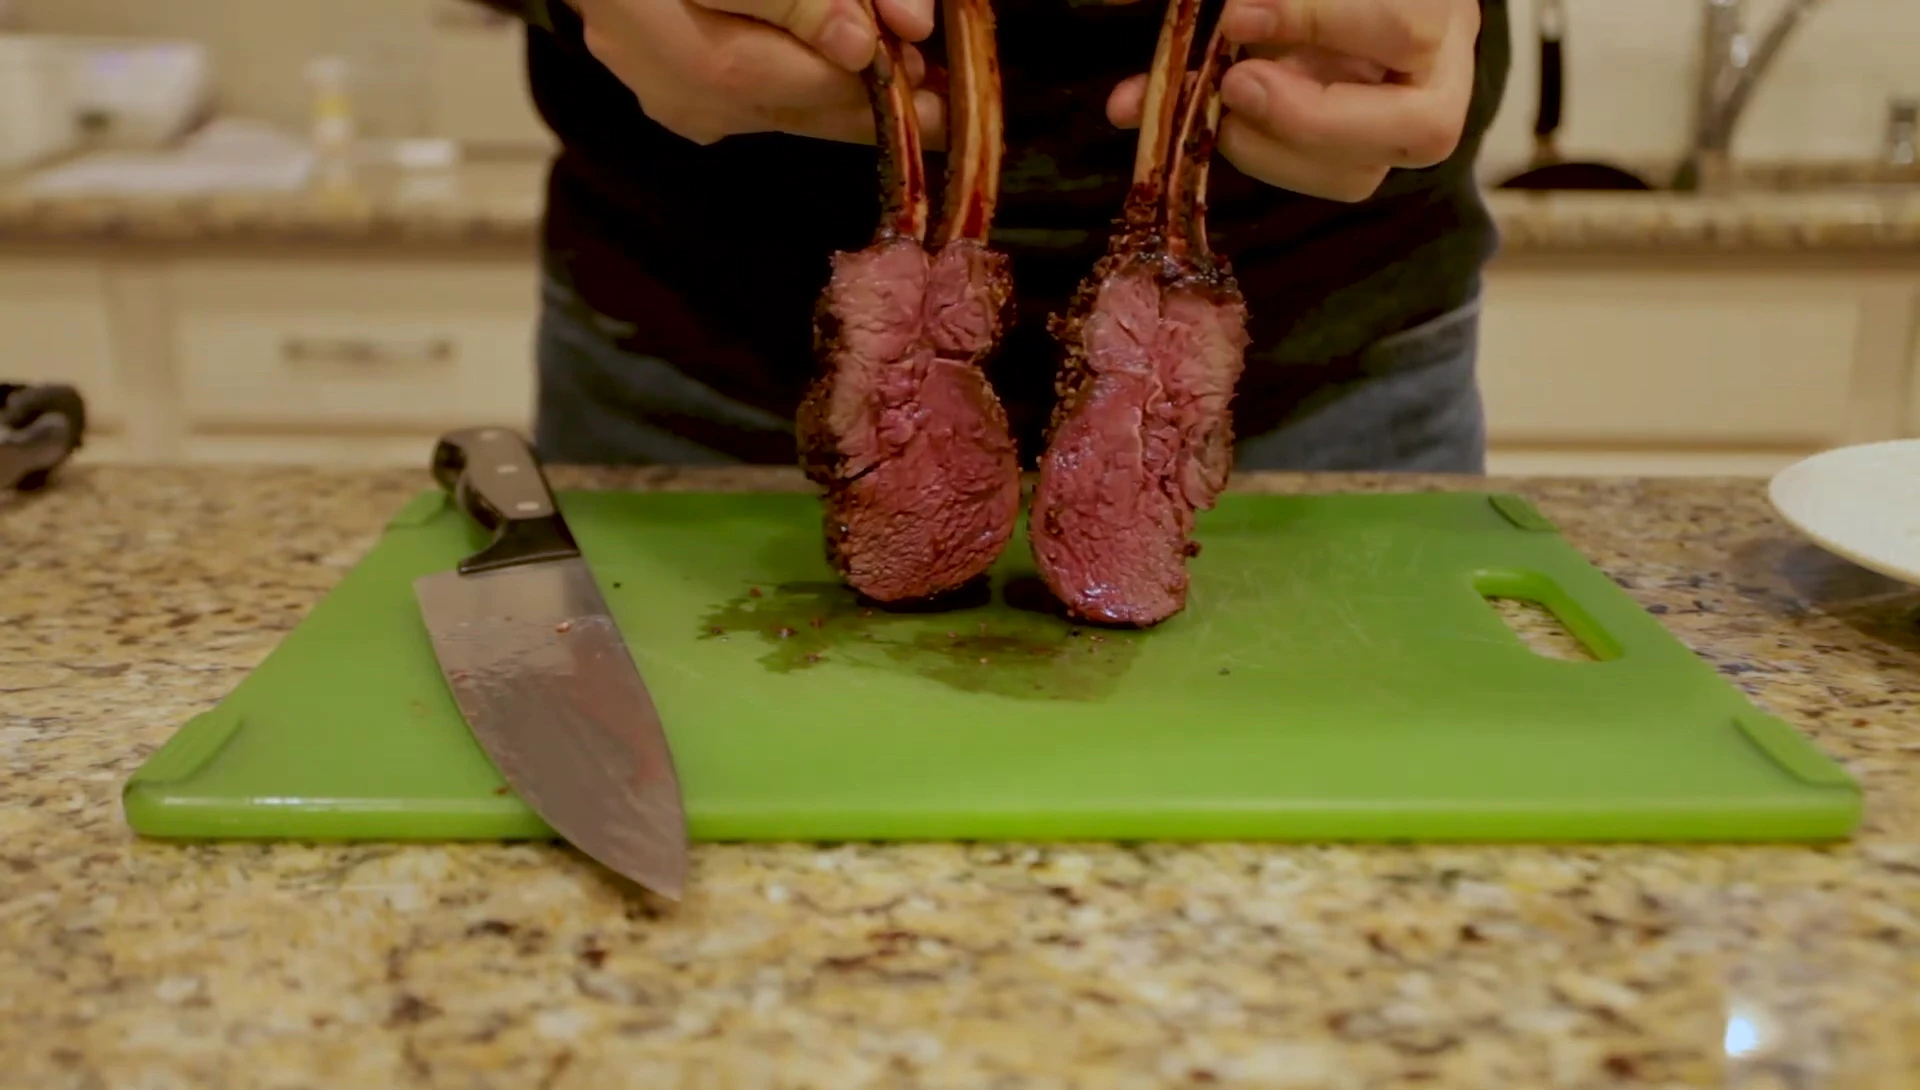
Final Result and Conclusion
After resting, I carved the venison, revealing a beautiful cross-section of tender, juicy meat with a delicious brown exterior. The taste was rich and gamey, but surprisingly similar to beef in texture.

This was my first experience with venison, and it exceeded my expectations. The seasoning balanced the stronger flavor profile well. The meat was incredibly tender, juicy, and flavorful.
I believe venison is versatile and could be fantastic in other recipes like stews or chili. However, this simple preparation showcases its delicious potential on its own. If you have access to venison, I highly recommend giving it a try on your Kamado Joe!